When it comes to creating dreamy, delicious frozen treats at home, Ninja Creami recipes are the ultimate solution. Imagine whipping up creamy ice creams, refreshing sorbets, and even healthy smoothie bowls in your own kitchen—all while spending quality time with your family.
Rainy days, birthday parties, or even just lazy afternoons can become exciting adventures when you dive into the world of Ninja Creami. It’s not just about making desserts; it’s about creating memories.
What Is a Ninja Creami Ice Cream Maker?
Parents, this one’s for you. With this magical machine, you can easily cater to your family’s cravings while keeping an eye on the ingredients. That means happy kids, stress-free moms, and treats that everyone will love. Let’s explore how to get the most out of your Ninja Creami and the best recipes to try!
The Ninja Creami isn’t just your average kitchen gadget. It’s a revolutionary appliance for dessert lovers who crave creamy, customizable, and healthier frozen treats. Whether you’re making protein-packed ice cream for your post-workout snack or fun fruity creations for the kids, this machine has got you covered.
Ingredients for These Ninja Creami Recipes
The best part about these recipes is the simplicity. No need for fancy stuff; you likely already have what you need:
- Milk: Choose dairy or non-dairy options like almond, oat, or coconut milk.
- Protein Powder: Use your favorite brand to boost nutrition.
- Natural Sweeteners: Honey, agave syrup, or even mashed bananas add a hint of sweetness.
- Flavor Additions: Cocoa powder, vanilla extract, or fresh fruit purees.
- Fun Mix-Ins: Crushed cookies, sprinkles, peanut butter, or chocolate chips.
This lineup means you can get creative with your flavors while keeping it family-friendly and nutritious.
How to Make the Healthy Ice Cream
Creating healthy ice cream with your Ninja Creami is easier than you think, and the results are just as indulgent as their high-calorie counterparts. With a few clever substitutions and the right ingredients, you can enjoy creamy, satisfying ice cream that fits into your lifestyle—whether you’re aiming for low-carb, dairy-free, or simply more nutritious options. Here’s your ultimate guide to whipping up guilt-free ice cream that doesn’t skimp on flavor!
Start with the Right Base
The base is the foundation of any ice cream recipe, and for a healthy version, the key is to use whole, nutritious ingredients that mimic the creaminess of traditional recipes. Here are some options:
- Greek Yogurt: A high-protein, low-fat option that provides a rich, tangy flavor.
- Coconut Milk: Perfect for a dairy-free alternative, adding a subtle tropical note.
- Almond Milk or Oat Milk: Low-calorie and versatile, great for keeping things light.
- Bananas: Frozen bananas are a classic for creating a creamy texture without dairy.
Sweeten Naturally
Refined sugar is often the culprit in unhealthy ice creams. Luckily, there are natural sweeteners that work just as well:
- Honey or Maple Syrup: Add a touch of sweetness while keeping it natural.
- Stevia or Monk Fruit: Zero-calorie sweeteners that blend seamlessly into the mix.
- Dates: Blend pitted dates into your base for natural sweetness and extra fiber.
Pro Tip: Taste your base mixture before freezing to ensure the sweetness is just right!
Flavor It Up
Healthy ice cream doesn’t have to mean boring. You can create a variety of flavors by mixing in nutrient-rich ingredients:
- Vanilla Bean or Extract: A classic that enhances almost any recipe.
- Cocoa Powder: Go for unsweetened to keep the sugar content down.
- Fresh or Frozen Fruits: Strawberries, mangoes, blueberries—the options are endless!
- Nut Butters: Almond, peanut, or cashew butter can add creaminess and depth.
Experiment with spices like cinnamon, cardamom, or nutmeg for unique flavor profiles.
Add Texture with Mix-Ins
Who doesn’t love a little crunch or chewiness in their ice cream? Stick to wholesome additions:
- Chopped Nuts: Almonds, walnuts, or pistachios add protein and a satisfying crunch.
- Dark Chocolate Chips: Opt for 70% or higher cocoa content for antioxidant benefits.
- Chia Seeds: A sneaky way to boost fiber and omega-3s.
- Coconut Flakes: Toasted or raw, they add a delicious tropical flair.
The Ninja Creami Process
Once your base is ready, it’s time to let the Ninja Creami work its magic. Here’s how:
Add Mix-Ins: If you’re adding extras like nuts or chocolate chips, use the “Mix-In” function to evenly distribute them.a perfect texture every time, whether it’s a protein-packed treat or a fruity delight.
Freeze the Base: Pour your prepared mixture into the Ninja Creami pint container. Cover it and freeze for 24 hours. Patience is key for the best results!
Blend to Perfection: Insert the pint into the machine and select the “Ice Cream” mode. This process ensures a smooth, creamy consistency.
Refine If Needed: If your mixture isn’t creamy enough, use the “Re-spin” function to achieve the ideal texture.
Basic Chocolate Protein Ice Cream
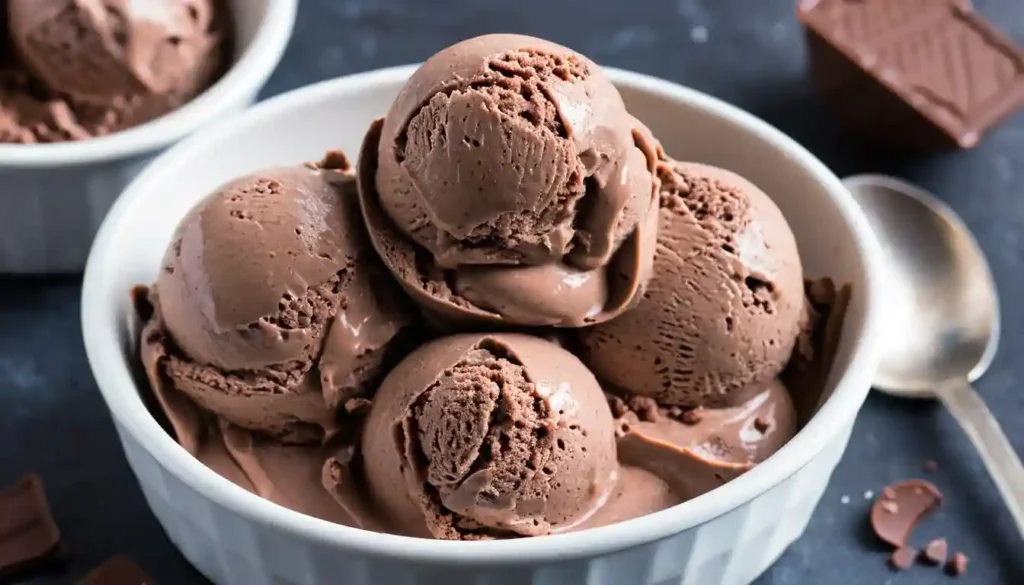
If you’re looking for a rich, chocolatey dessert that satisfies your sweet tooth and helps you meet your fitness goals, this Basic Chocolate Protein Ice Cream recipe is your answer. Packed with protein, low in sugar, and creamy enough to rival any store-bought pint, this recipe is perfect for anyone on a health kick or just craving a guilt-free indulgence. Plus, it’s incredibly simple to make with your Ninja Creami.
Why Make Chocolate Protein Ice Cream?
This recipe isn’t just delicious—it’s also packed with benefits:
- Protein Power: Ideal for a post-workout snack or a midday pick-me-up.
- Customizable: Adjust sweetness, richness, or add your favorite mix-ins for a unique twist.
- Healthier Dessert: Unlike store-bought versions loaded with sugar, this recipe keeps things light without sacrificing flavor.
Craving something chocolaty without derailing your healthy habits? This protein-packed ice cream gives you all the indulgence of chocolate with none of the guilt. Perfect for busy parents needing a treat that doubles as a quick protein boost!
Ingredients You’ll Need
For this creamy delight, you only need a few wholesome ingredients:
- 1 Scoop Chocolate Protein Powder: Choose a high-quality, whey or plant-based option based on your preference.
- 1 Cup Unsweetened Almond Milk: Adds creaminess without extra calories. Substitute with oat milk or coconut milk for variety.
- 2 Tablespoons Cocoa Powder: Use unsweetened for an extra-rich chocolate flavor.
- 1 Medium Banana (Frozen): Provides natural sweetness and a smooth texture.
- 1-2 Teaspoons Maple Syrup or Honey: Optional, for added sweetness.
- 1/4 Teaspoon Vanilla Extract: Elevates the chocolate flavor.
- Pinch of Sea Salt: Enhances the overall taste and balances sweetness.
Step-by-Step Instructions
Get ready to make the smoothest chocolate protein ice cream with these easy steps:
Optional Add-Ins
For extra crunch or flavor, stir in mix-ins like chopped nuts, dark chocolate chips, or shredded coconut using the “Mix-In” setting.
Blend the Base
Combine the almond milk, chocolate protein powder, cocoa powder, frozen banana, maple syrup (if using), vanilla extract, and sea salt in a blender. Blend until the mixture is completely smooth.
Prepare the Ninja Creami Pint
Pour the blended mixture into the Ninja Creami pint container. Be sure to leave about half an inch of space at the top to allow for expansion.
Freeze for 24 Hours
Place the pint in your freezer and let it freeze for at least 24 hours. This step ensures the perfect consistency when you process it in the Creami.
Process in the Ninja Creami
Once frozen, insert the pint into the Ninja Creami machine. Select the “Ice Cream” function. If the texture isn’t as creamy as you’d like, hit the “Re-spin” button to refine it.
Tips for Perfect Chocolate Protein Ice Cream
- Experiment with Protein Powders: Some powders are sweeter or creamier than others, so find one that matches your taste.
- Don’t Skip the Banana: It’s the secret ingredient for a naturally creamy texture.
- Adjust Sweetness: Taste the base before freezing and adjust sweetness as needed.
Basic Vanilla Ice Cream
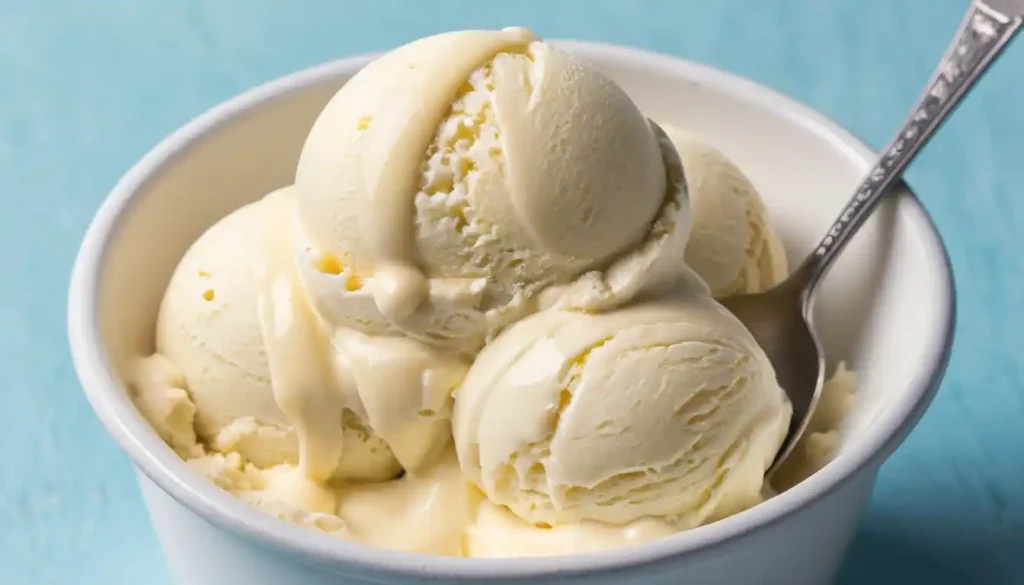
Sometimes, nothing beats the simplicity of a creamy, dreamy vanilla ice cream. Whether you’re serving it solo, topping a warm dessert, or pairing it with fresh fruit, this recipe delivers a smooth and rich flavor that will make everyone ask for seconds. With the Ninja Creami, you can create this classic treat with fewer calories, less sugar, and even more customizable options than store-bought alternatives.
Why Make Basic Vanilla Ice Cream?
Vanilla ice cream is more than just a dessert—it’s a versatile canvas for creativity. Here’s why you’ll love making it at home:
- Pure and Customizable: Skip the artificial flavors and adjust sweetness or creaminess to your liking.
- Healthier Option: Control the ingredients to reduce sugar and boost nutrition while still enjoying the creamy richness.
- Family Favorite: Perfect for kids, parents, and everyone in between. It’s the flavor that never goes out of style.
- Flexible Base: Use it as the foundation for mix-ins or flavor twists like fruit, nuts, or chocolate chips.
Ingredients You’ll Need
Creating this vanilla masterpiece doesn’t require a long grocery list. Here’s what you’ll need:
- 1 Cup Whole Milk or a Non-Dairy Alternative: Whole milk provides richness, but almond or oat milk works beautifully for a lighter, dairy-free option.
- 1/2 Cup Heavy Cream (or Coconut Cream for Non-Dairy): Adds the velvety texture we all crave.
- 1/4 Cup Granulated Sugar or Sweetener of Choice: Opt for coconut sugar, monk fruit, or stevia for a healthier twist.
- 1-2 Teaspoons Pure Vanilla Extract: The star ingredient for that warm, aromatic flavor. Use high-quality vanilla for the best taste.
- Pinch of Sea Salt: Enhances the flavors and balances sweetness.
Step-by-Step Instructions
Get ready to craft the creamiest, most flavorful vanilla ice cream with these easy steps:
Add Your Twist (Optional)
After the initial spin, mix in your favorite add-ins like crushed cookies, chocolate chunks, or fresh fruit. Use the “Mix-In” setting for even distribution.
Combine the Ingredients
In a medium-sized mixing bowl, whisk together the milk, cream, sugar, vanilla extract, and sea salt. Stir until the sugar fully dissolves.
Pour the Mixture into the Ninja Creami Pint
Carefully transfer the mixture into the pint container. Leave about half an inch of space at the top to allow for freezing expansion.
Freeze for 24 Hours
Place the pint in the freezer and let it sit for at least 24 hours. This freezing time ensures a smooth, scoopable consistency when processed.
Process in the Ninja Creami
Insert the frozen pint into the Ninja Creami machine. Select the “Ice Cream” function and let the machine work its magic. If the texture isn’t creamy enough, use the “Re-spin” option for perfection.
Tips for Perfect Vanilla Ice Cream
- Chill Your Ingredients: Start with cold milk and cream to help the freezing process.
- Use Quality Vanilla: Pure vanilla extract makes a big difference in flavor. Avoid artificial substitutes.
- Sweeten to Taste: Test the mixture before freezing and adjust sweetness if needed.
Cookies and Cream
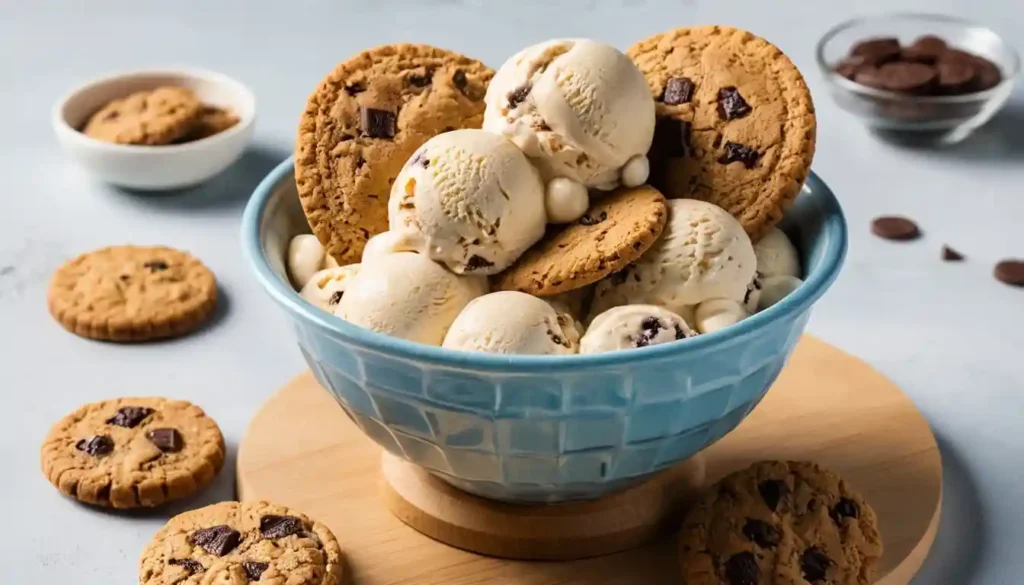
Who can resist the indulgence of cookies and cream ice cream? With chunks of chocolatey cookies nestled in creamy vanilla ice cream, it’s the perfect combination of crunchy and smooth textures. Making it with the Ninja Creami elevates this classic treat to a whole new level, allowing you to control the ingredients and enjoy a fresher, more delicious dessert that everyone will love.
Why Make Cookies and Cream Ice Cream at Home?
Homemade cookies and cream ice cream is more than just a treat. It’s an opportunity to:
- Customize Your Favorite Dessert: Choose your preferred cookies, sweetness level, and creaminess.
- Healthier Indulgence: Reduce sugar, opt for organic ingredients, or use dairy-free alternatives.
- Fun for the Family: Kids love helping with this recipe, from crushing the cookies to adding mix-ins.
- Better Taste and Texture: Freshly made ice cream is always creamier, smoother, and more flavorful.
Ingredients You’ll Need
This easy recipe uses simple ingredients, making it accessible and fun to whip up anytime:
- 1 Cup Whole Milk or Non-Dairy Milk: Whole milk provides richness, but almond or oat milk works for a lighter version.
- 1/2 Cup Heavy Cream or Coconut Cream: Essential for that signature creamy texture.
- 1/4 Cup Granulated Sugar or Sweetener: Adjust sweetness to your taste using sugar, monk fruit, or a natural alternative.
- 1-2 Teaspoons Vanilla Extract: The base flavor that blends beautifully with the cookies.
- 10-12 Chocolate Sandwich Cookies: Classic options like Oreos work best, but any similar cookie will do. Use gluten-free if needed.
- Pinch of Sea Salt: Enhances flavors and balances the sweetness.
Step-by-Step Instructions
Creating this beloved ice cream flavor is straightforward and fun. Follow these steps:
- Prepare the Ice Cream Base
Combine the milk, heavy cream, sugar, vanilla extract, and sea salt in a mixing bowl. Stir until the sugar is fully dissolved. - Crush the Cookies
Place the cookies in a zip-top bag and use a rolling pin to crush them into small pieces. Keep some larger chunks for extra texture. - Pour the Mixture into the Ninja Creami Pint
Transfer the ice cream base into the pint container, leaving about half an inch of space at the top. - Freeze for 24 Hours
Place the pint in the freezer for at least 24 hours to allow it to solidify. - Process in the Ninja Creami
Insert the frozen pint into the Ninja Creami and select the “Ice Cream” setting. Once processed, use the “Mix-In” function to fold in the crushed cookies evenly. - Serve or Store
Scoop and enjoy immediately or transfer back to the pint container for later. Homemade cookies and cream ice cream is best enjoyed fresh.
Tips for Perfect Cookies and Cream Ice Cream
- Crush Cookies Just Right: Aim for a mix of fine crumbs and larger chunks to add texture without overpowering the creamy base.
- Chill Ingredients: Starting with cold milk and cream speeds up the freezing process.
- Experiment with Cookies: Try different types of cookies like chocolate chip, peanut butter, or gluten-free alternatives.
Ninja Creami Strawberry Ice Cream
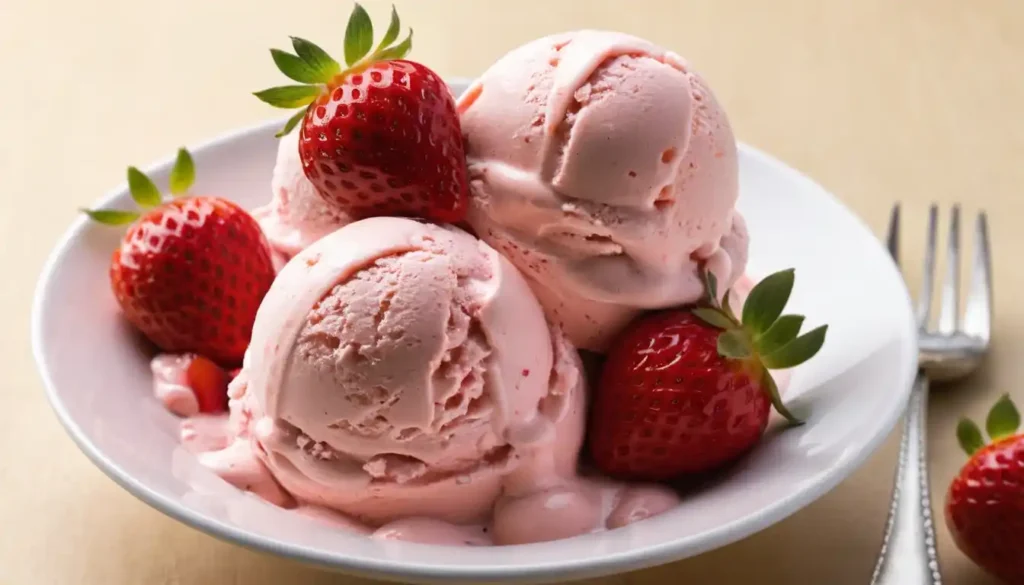
If you’re craving something fruity, creamy, and oh-so-delicious, look no further than Ninja Creami strawberry ice cream. This homemade ice cream is a sweet, refreshing treat perfect for warm days or anytime you want to indulge without feeling guilty. The Ninja Creami makes it super easy to achieve that perfect creamy texture, and best of all, you can use fresh ingredients to make a healthier version of this classic dessert.
Why Make Strawberry Ice Cream at Home?
Homemade strawberry ice cream is the way to go for several reasons:
- Fresh, Natural Flavor: Using fresh strawberries means your ice cream will taste so much more vibrant and flavorful than store-bought versions.
- Control the Ingredients: You can adjust the sweetness, use organic ingredients, or make it dairy-free based on your dietary preferences.
- Creamy Texture: The Ninja Creami gives you that perfect smooth, velvety texture that’s hard to beat.
- Fun and Easy: It’s a simple recipe that’s great for kids to help with—crushing the strawberries and mixing the ingredients is always fun!
Ingredients You’ll Need
Making strawberry ice cream at home is easy when you have the right ingredients:
- 1 Cup Fresh Strawberries: For the best flavor, use ripe, sweet strawberries. You can also use frozen strawberries if fresh ones aren’t available.
- 1/2 Cup Heavy Cream or Coconut Cream: This will give your ice cream its rich, creamy texture.
- 1/2 Cup Whole Milk or Non-Dairy Milk: Whole milk is great for a creamy base, but almond or oat milk works well for dairy-free versions.
- 1/4 Cup Granulated Sugar or Sweetener: Adjust the sweetness depending on your preference. You can use regular sugar, stevia, or any other sweetener.
- 1 Teaspoon Vanilla Extract: Adds a touch of warmth to balance the freshness of the strawberries.
- Pinch of Sea Salt: Enhances the sweetness and flavors of the fruit.
Step-by-Step Instructions
Follow these easy steps to create your own homemade strawberry ice cream with the Ninja Creami:
- Prepare the Strawberry Puree
Wash and hull the strawberries, then blend them in a blender or food processor until smooth. If you like chunky bits, pulse a few times to keep some strawberry pieces intact. - Mix the Ingredients
In a bowl, combine the strawberry puree with the heavy cream, whole milk, sugar, vanilla extract, and a pinch of sea salt. Stir until everything is fully mixed and the sugar has dissolved. - Freeze the Mixture
Pour the mixture into the Ninja Creami pint container, leaving about half an inch of space at the top for expansion as it freezes. Seal the container with the lid and freeze it for at least 24 hours. - Process in the Ninja Creami
Once the mixture is frozen solid, place the pint into the Ninja Creami and select the “Ice Cream” setting. After processing, you’ll have a smooth, creamy texture. If you want it extra creamy, you can run the “Re-spin” function until it reaches your desired consistency. - Serve and Enjoy
Once done, scoop the strawberry ice cream into bowls or cones, and enjoy! You can also add fresh fruit, chocolate chips, or a drizzle of honey on top for extra flair.
Tips for Perfect Strawberry Ice Cream
- Use Ripe Strawberries: The sweeter the strawberries, the better the flavor. Choose ripe, in-season berries for the most intense strawberry taste.
- Blend the Mixture Well: Be sure to mix the cream and milk thoroughly with the strawberry puree to avoid separation.
- Don’t Over-Sweeten: Strawberries are naturally sweet, so be mindful not to add too much sugar. You can always taste the mixture before freezing and adjust the sweetness to your liking.
- Consider Adding a Swirl: For extra fun, swirl in some strawberry jam or a strawberry compote after the ice cream is processed in the Ninja Creami.
Banana Cream Pie Protein Ice Cream
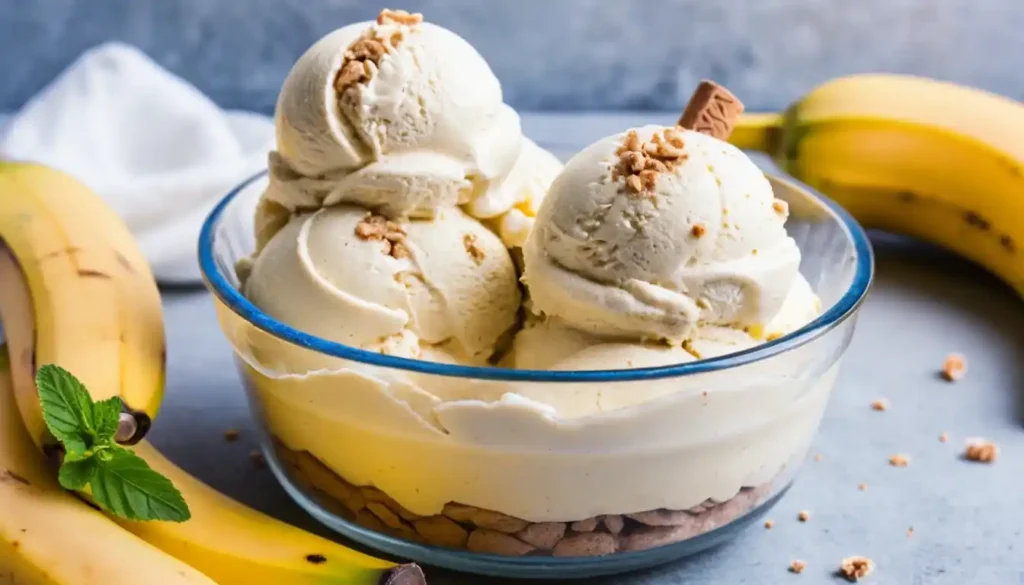
Craving something creamy, dreamy, and full of flavor? Banana Cream Pie Protein Ice Cream is a delicious way to indulge without the guilt, and with the Ninja Creami, it’s super easy to make. This protein-packed frozen treat combines the rich flavors of banana and a hint of vanilla with a creamy texture that tastes just like banana cream pie, but without the extra calories. Perfect for busy moms or anyone looking for a healthier dessert, this ice cream will hit the spot and fuel your body with the nutrients it needs!
Why Make Banana Cream Pie Protein Ice Cream?
This homemade ice cream is not only delicious, but it’s also:
- Protein-Packed: Thanks to the addition of protein powder, this ice cream provides a nice boost of protein, perfect for post-workout recovery or a healthy snack.
- Banana Flavor Bliss: If you love banana cream pie, you’re going to adore this flavor. The natural sweetness of bananas pairs perfectly with the creamy texture.
- Lower in Sugar: By using sweeteners like stevia or monk fruit, you can keep the sugar content low while still satisfying your sweet tooth.
- Dairy-Free Option: With simple substitutions, this can easily be made dairy-free, so everyone can enjoy it.
- Quick and Easy: The Ninja Creami does all the work for you, turning simple ingredients into a delightful frozen treat.
Ingredients You’ll Need
To whip up this healthy banana cream pie-inspired ice cream, you’ll need the following ingredients:
- 1 Large Banana: Make sure it’s ripe for that natural sweetness.
- 1/2 Cup Greek Yogurt: For creaminess and added protein. You can substitute this with dairy-free yogurt if needed.
- 1/2 Cup Unsweetened Almond Milk (or any milk of choice): Helps achieve that perfect consistency.
- 1 Scoop Vanilla Protein Powder: Adds the protein and keeps the flavor light and smooth. You can use any type of protein powder—whey, plant-based, or collagen-based.
- 1/4 Teaspoon Banana Extract: This intensifies the banana flavor, but it’s optional if you prefer a more natural taste.
- 1/2 Teaspoon Vanilla Extract: For that classic pie flavor.
- 1/4 Cup Light Coconut Milk (Optional for added creaminess): This adds richness, but you can skip it if you want to keep the recipe lower in fat.
- Sweetener to Taste: You can use stevia, monk fruit, or a little honey or maple syrup, depending on your preference.
- Pinch of Sea Salt: To bring out the sweetness and enhance the overall flavor.
Step-by-Step Instructions
Making Banana Cream Pie Protein Ice Cream in the Ninja Creami is super easy. Here’s how to do it:
- Prepare the Banana Mixture
Start by peeling the banana and cutting it into small pieces. Add the banana pieces, Greek yogurt, almond milk, protein powder, banana extract, vanilla extract, sweetener, and a pinch of salt into a blender or food processor. Blend until the mixture is smooth and well-combined. - Freeze the Mixture
Pour the banana mixture into the Ninja Creami pint container. Be sure to leave about an inch of space at the top, as the mixture will expand as it freezes. Seal the container with the lid and place it in the freezer for about 24 hours. The mixture needs to be frozen solid before processing in the Ninja Creami. - Process in the Ninja Creami
After the mixture is completely frozen, pop the pint into the Ninja Creami machine. Select the “Ice Cream” setting and let the Ninja Creami do its magic! In just a few minutes, you’ll have a creamy, protein-packed frozen treat. If you want an extra creamy texture, you can run the “Re-spin” function a few times. - Serve and Enjoy
Once the ice cream has reached the perfect consistency, scoop it into bowls or cones and enjoy! For an extra touch, you can add chopped bananas, graham cracker crumbs, or even a drizzle of caramel to make it taste like a real banana cream pie.
Tips for Perfect Banana Cream Pie Protein Ice Cream
- Use Overripe Bananas: The riper the banana, the sweeter and more flavorful the ice cream will be. Overripe bananas are perfect for making naturally sweet treats.
- Adjust Sweetness: Taste the mixture before freezing it and adjust the sweetness if needed. Protein powder can vary in sweetness, so it’s important to get the balance just right for your taste.
- Add Toppings for Extra Flavor: To mimic the “pie” aspect, top your ice cream with crushed graham crackers or a sprinkle of cinnamon for a little extra texture and flavor.
- Make it Dairy-Free: If you’re dairy-free, substitute the Greek yogurt with coconut yogurt, and use dairy-free milk options. You can still achieve that creamy, satisfying texture!
Snickers Chocolate Ice Cream
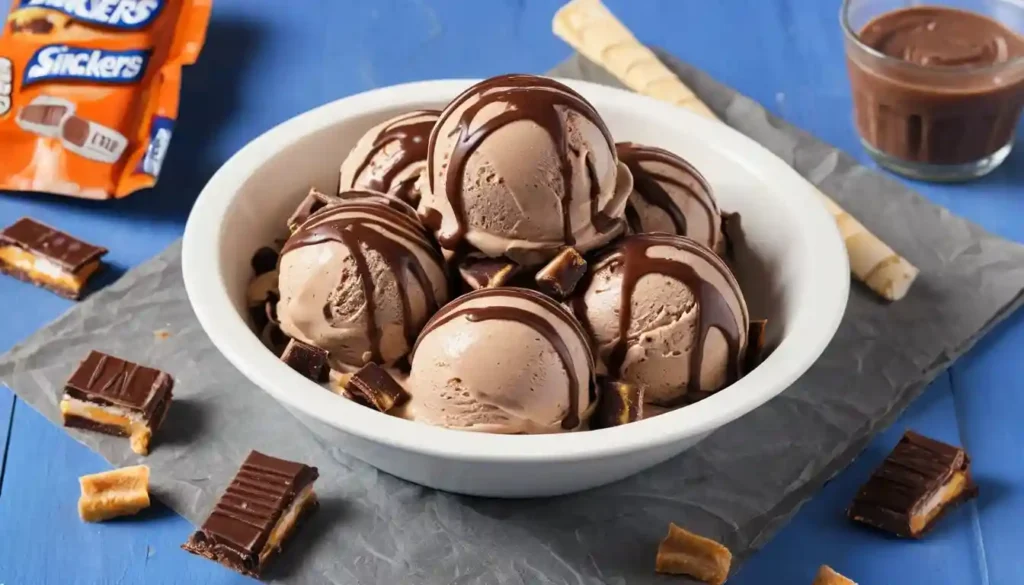
Who doesn’t love the combination of creamy chocolate, caramel, peanuts, and a touch of nougat? Snickers Chocolate Ice Cream is the ultimate dessert for anyone with a sweet tooth, especially when made at home using the Ninja Creami! This decadent frozen treat takes all the flavors of your favorite candy bar and turns them into a rich, creamy, and satisfying ice cream. Whether you’re craving a special indulgence or looking to treat your family to something delicious, this recipe will definitely do the trick.
Why Make Snickers Chocolate Ice Cream?
There are so many reasons to make Snickers Chocolate Ice Cream:
- Decadent Flavor: It combines the classic Snickers taste, with chocolate, caramel, peanuts, and a creamy base that’s irresistibly good.
- Protein Boost: By using healthy ingredients like protein powder (if you choose), this treat can provide a protein boost and is perfect for post-workout indulgence.
- Customizable: You can make this recipe as healthy as you like by adjusting the ingredients, swapping in lower-sugar sweeteners, or even making it dairy-free.
- Simple to Make: The Ninja Creami makes this process super easy. You just freeze your ingredients, pop them into the machine, and let it do the hard work.
Ingredients You’ll Need
To make Snickers Chocolate Ice Cream, here’s what you’ll need:
- 1 Cup Whole Milk or Dairy-Free Milk: For a creamy base. You can use almond milk, coconut milk, or any milk of your choice.
- 1/2 Cup Heavy Cream: This adds extra richness and a luxurious texture.
- 1 Scoop Chocolate Protein Powder (Optional): This is a great way to add protein to the ice cream without altering the flavor too much. It’s also a nice addition if you want a post-workout treat.
- 1/4 Cup Peanut Butter: Smooth peanut butter will give that nutty flavor and a hint of creaminess.
- 1/4 Cup Caramel Sauce: You can make your own caramel or use a store-bought version for convenience.
- 1/2 Cup Chopped Peanuts: These provide the signature crunch and saltiness you find in Snickers bars.
- 1/2 Cup Mini Chocolate Chips: For that extra chocolatey goodness.
- 1/2 Teaspoon Vanilla Extract: This adds a little sweetness and rounds out the flavor.
- Sweetener to Taste: You can use stevia, monk fruit, or even a bit of honey if you want a little extra sweetness. Adjust according to your preference.
Step-by-Step Instructions
Making Snickers Chocolate Ice Cream in the Ninja Creami is as simple as it gets. Follow these easy steps:
- Prepare the Ice Cream Base
In a large bowl, whisk together the milk, heavy cream, peanut butter, vanilla extract, and sweetener. If you’re adding protein powder, mix it in now until it’s fully dissolved and smooth. - Freeze the Mixture
Once everything is combined, pour the mixture into the Ninja Creami pint container, leaving about an inch of space at the top to allow the mixture to expand while freezing. Seal the container with the lid and place it in the freezer for at least 24 hours until the mixture is completely frozen. - Process in the Ninja Creami
After the mixture is completely frozen, remove the pint from the freezer and place it into your Ninja Creami. Select the “Ice Cream” setting, and let the machine work its magic. You should see your ice cream begin to form into a rich, creamy texture. - Add Snickers Elements
Once the base is ready, stir in the chopped peanuts and mini chocolate chips. You can add a little extra caramel sauce at this point for a more indulgent taste. If you want a more “Snickers” flavor, feel free to mix in some nougat bits, too. - Re-spin for Extra Creaminess
If the ice cream isn’t as creamy as you’d like after the first spin, use the “Re-spin” option to give it a few more minutes until it reaches the perfect texture. - Serve and Enjoy
Scoop the ice cream into bowls or cones, drizzle with extra caramel sauce, and top with additional peanuts and chocolate chips. Now you’re ready to enjoy your homemade Snickers Chocolate Ice Cream!
Tips for Perfect Snickers Chocolate Ice Cream
- Use Ripe Bananas: If you want to reduce sugar and make this a bit healthier, you can try using mashed bananas as a sweetener in place of sugar or syrup.
- Freeze Ingredients in Layers: If you want to add even more Snickers-like layers, freeze the base and then swirl in the peanuts and caramel sauce before freezing again.
- Make It Dairy-Free: For a dairy-free version, swap the heavy cream and milk with coconut milk or any dairy-free alternatives you enjoy. Be sure to check that your protein powder is dairy-free, too.
- Adjust Sweetness: Make sure to taste the base mixture before freezing, as protein powders and peanut butter vary in sweetness. You can always add a little extra sweetener if you need to.
Birthday Cake Ice Cream
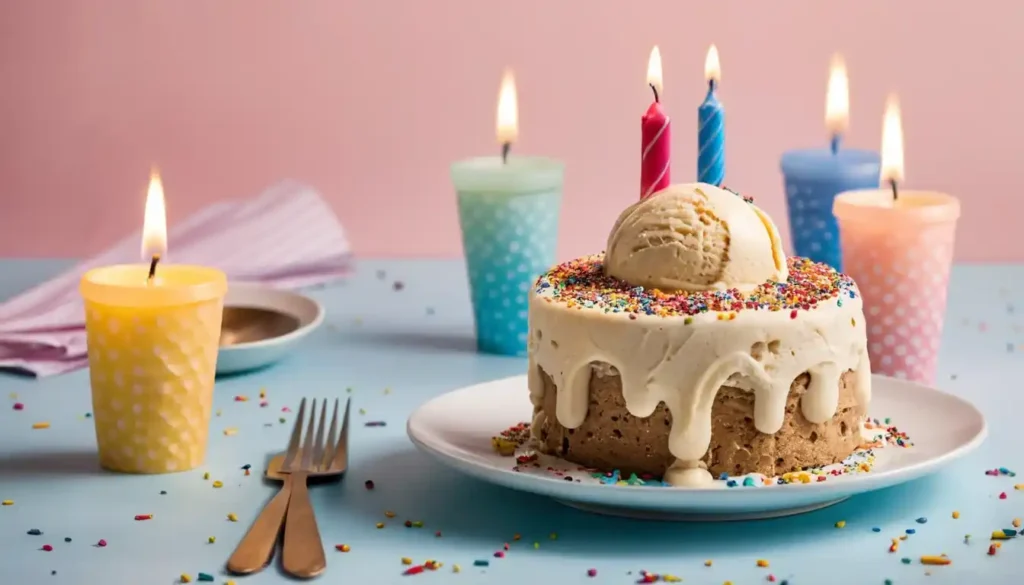
Who says birthday cake is only for parties? Birthday Cake Ice Cream is a festive treat that brings the celebration to your kitchen, no matter the occasion. Made with the rich, creamy base of ice cream and mixed with cake bits, sprinkles, and all the fun of a birthday, this recipe is sure to please anyone with a sweet tooth. And with the Ninja Creami, you can have this delightful dessert ready to enjoy with little effort!
Why Make Birthday Cake Ice Cream?
There are plenty of reasons to whip up a batch of Birthday Cake Ice Cream:
- Fun & Festive: The bright colors and delicious flavor make this ice cream perfect for birthdays, anniversaries, or any celebration.
- Customizable: You can adjust the level of sweetness or use your favorite cake flavor (vanilla, chocolate, etc.) to make this dessert even more personalized.
- Easy to Make: Using the Ninja Creami makes this recipe a breeze. No complicated steps or ice cream makers required!
- Perfect for All Ages: Whether you’re celebrating with kids or indulging as an adult, this ice cream brings smiles to everyone.
Ingredients You’ll Need
To make your Birthday Cake Ice Cream, gather these ingredients:
- 2 Cups Heavy Cream: For a rich, creamy base.
- 1 Cup Whole Milk: Adds a smooth texture to the ice cream.
- 1/2 Cup Birthday Cake Mix (you can use vanilla cake mix for the classic flavor): This is the key ingredient that gives the ice cream that authentic birthday cake flavor.
- 1/2 Cup Sprinkles: These will add color, texture, and a fun crunch to your ice cream. Go wild with rainbow or themed sprinkles to match the occasion!
- 1/4 Cup White Sugar: This adds extra sweetness, but you can reduce it if your cake mix already has enough sugar.
- 1 Teaspoon Vanilla Extract: For a little extra depth in flavor.
- 1/4 Cup of Mini Cake Pieces or Crumbled Cake: Optional, but this adds even more of that cake-like texture to your ice cream.
- Pinch of Salt: Helps balance the sweetness of the dessert.
Step-by-Step Instructions
Making Birthday Cake Ice Cream with your Ninja Creami is super simple. Follow these easy steps for a fun, festive dessert that everyone will love.
- Make the Ice Cream Base
In a large bowl, whisk together the heavy cream, whole milk, sugar, birthday cake mix, and vanilla extract. Stir until the cake mix is fully dissolved and the mixture is smooth. If you want an even richer taste, you can add a little more sugar or cake mix, but keep in mind that the sweetness will come from the sprinkles and cake pieces too. - Freeze the Base
Once the base is fully mixed, pour it into your Ninja Creami pint container. Be sure to leave some room at the top for the mixture to expand as it freezes. Seal the lid and place the container in the freezer for about 24 hours until it is completely frozen. - Process the Ice Cream
After the base has frozen, remove it from the freezer and pop it into your Ninja Creami machine. Select the “Ice Cream” setting and allow the machine to process the mixture. In just a few minutes, you’ll have a smooth, creamy, birthday cake-flavored ice cream. - Add the Fun Stuff
Once the base is ready, take the pint out of the Ninja Creami and stir in the mini cake pieces and sprinkles. You can either fold these in gently or re-spin the ice cream to mix everything together. - Re-spin for Extra Creaminess
If you want an even creamier texture, run the “Re-spin” cycle once more to achieve the perfect consistency. - Serve & Enjoy
Scoop the ice cream into bowls or cones, top with extra sprinkles, and enjoy the sweetness of Birthday Cake Ice Cream! You can also drizzle a little frosting or whipped cream on top for an extra festive touch.
Tips for Perfect Birthday Cake Ice Cream
Frozen Cake Bits: For more cake texture, use frozen cake pieces. Freeze the leftover cake before adding it to the ice cream mixture to keep it from turning into mush when mixed..
Use a High-Quality Cake Mix: For the best flavor, choose a high-quality vanilla or birthday cake mix. You want the ice cream to taste just like a slice of cake, so using a trusted mix will make a difference.
Customize the Flavor: If you prefer chocolate cake, feel free to swap the vanilla cake mix for a chocolate version. You can also use lemon or other flavored cake mixes to create a fun twist on this dessert.
Make It Dairy-Free: If you’re looking for a dairy-free option, you can substitute the heavy cream and milk with coconut milk or almond milk. Just be sure the cake mix you choose is also dairy-free, if needed.
Peanut Butter Cup Ice Cream
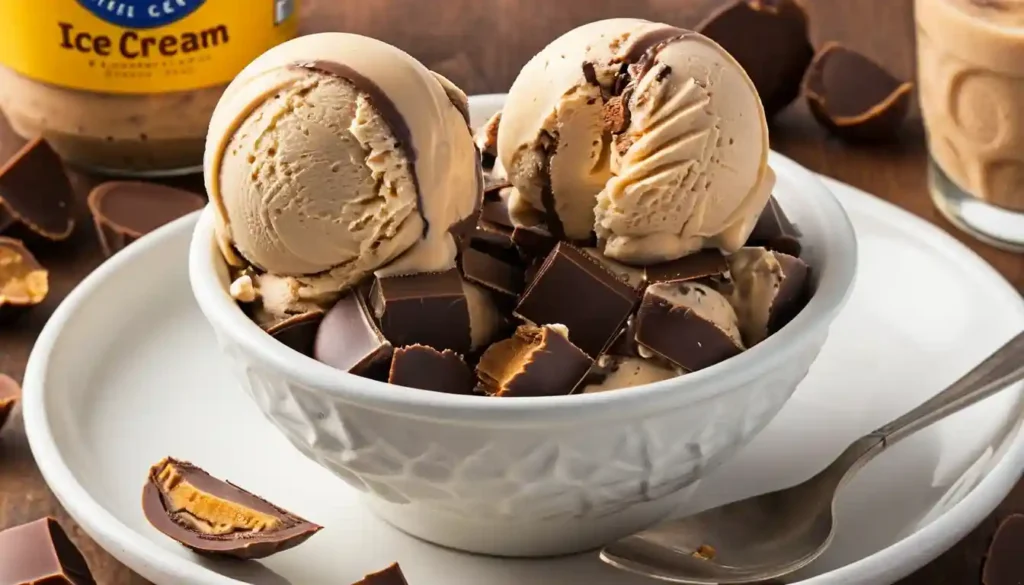
If you love peanut butter and chocolate, this Peanut Butter Cup Ice Cream is about to become your new favorite treat. With the rich creaminess of peanut butter and the sweet, chocolatey goodness of peanut butter cups, this ice cream is the ultimate indulgence. Made with your Ninja Creami, it’s so easy to whip up that you’ll want to make it again and again!
Why Make Peanut Butter Cup Ice Cream?
- Peanut Butter + Chocolate = Perfection: If you’re a fan of the iconic combo, this ice cream is your dream come true. Creamy peanut butter mixed with chunks of chocolate peanut butter cups creates a flavor explosion that’s hard to beat.
- Easy to Make: With the Ninja Creami, there’s no need to churn or spend hours waiting. Just freeze and blend, and you’ll have smooth, creamy ice cream in minutes!
- Great for Any Occasion: Whether it’s a lazy Sunday, a birthday celebration, or a special treat for your family, this Peanut Butter Cup Ice Cream is perfect for any time of year.
Ingredients You’ll Need
Here’s what you’ll need to make this indulgent dessert:
- 2 Cups Heavy Cream: Adds richness and a velvety texture.
- 1 Cup Whole Milk: To balance the creaminess and create the perfect consistency.
- 1/2 Cup Peanut Butter: Smooth or crunchy—whichever you prefer!
- 1/2 Cup Sugar: For that extra sweetness, but you can adjust based on your taste.
- 1 Teaspoon Vanilla Extract: A little hint of vanilla takes the flavor up a notch.
- Pinch of Salt: Balances the sweetness and enhances the flavors.
- 6-8 Peanut Butter Cups: Chop these up into bite-sized chunks for the perfect mix of chocolate and peanut butter in every scoop.
Step-by-Step Instructions
Making Peanut Butter Cup Ice Cream in your Ninja Creami is so simple. Just follow these easy steps for a dessert that’ll wow your taste buds.
- Prepare the Ice Cream Base
In a large bowl, whisk together the heavy cream, whole milk, peanut butter, sugar, vanilla extract, and salt. Mix until everything is smooth and the peanut butter is fully incorporated into the base. This is where the magic starts—don’t rush it! - Freeze the Base
Pour the ice cream mixture into your Ninja Creami pint container. Be sure to leave about an inch of space at the top to allow for expansion as it freezes. Seal the lid tightly and place the container in the freezer for about 24 hours. - Process the Ice Cream
Once the base is frozen, it’s time for the Ninja Creami magic! Pop the frozen pint into the Ninja Creami and select the “Ice Cream” setting. Let the machine do its work, and you’ll be left with a creamy, smooth peanut butter base. - Add the Peanut Butter Cup Chunks
After the ice cream is ready, remove the pint from the Ninja Creami and fold in the chopped peanut butter cups. You can add them all at once and give it a quick stir or run the “Re-spin” cycle for an even mix. - Re-spin for Extra Creaminess
If you want your ice cream to be even smoother, run the “Re-spin” cycle again to make sure everything is evenly mixed, and the texture is perfect. - Serve & Enjoy
Once your ice cream is mixed, it’s time to dig in! Scoop it into bowls or cones and top with extra peanut butter cups or a drizzle of peanut butter sauce if you like things extra indulgent.
Tips for Perfect Peanut Butter Cup Ice Cream
- Use Quality Peanut Butter: Choose a high-quality, creamy peanut butter for the best flavor. You can use natural peanut butter if you prefer, but make sure to stir it well since it tends to separate.
- Customize the Sweetness: If you prefer a sweeter ice cream, feel free to add a bit more sugar or honey. Taste the base before freezing to adjust it to your liking.
- Add a Swirl of Chocolate: For a rich, chocolatey twist, add some hot fudge or melted chocolate into the mix before freezing. A little chocolate swirl can take this ice cream to the next level.
- Storage Tip: If you have any leftovers (which is unlikely), store your ice cream in an airtight container in the freezer. It will last for up to a week, but the sooner you eat it, the better it tastes!
Pumpkin Pie Protein Ice Cream
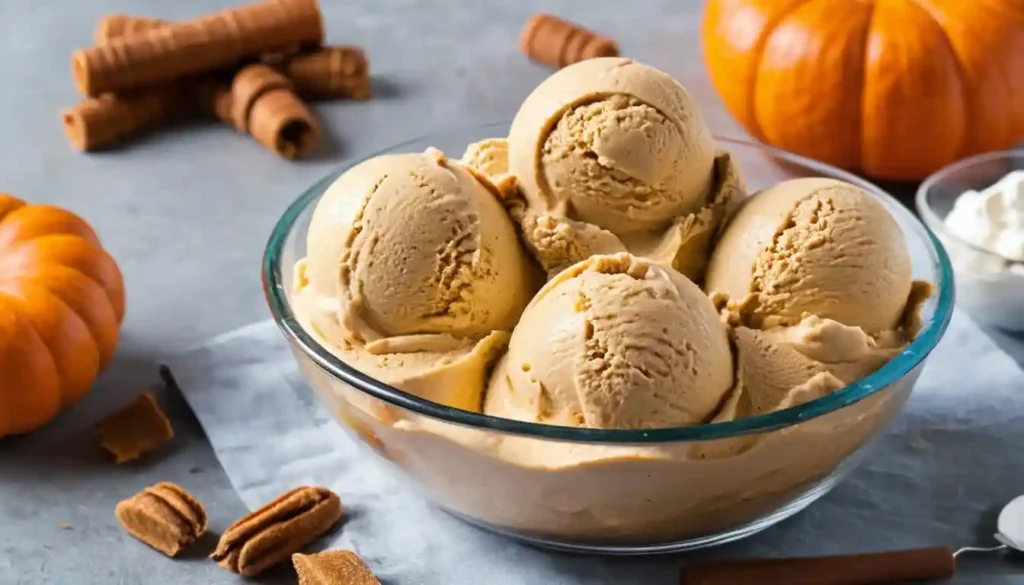
There’s something about fall that makes you crave all the warm and cozy flavors—especially pumpkin pie. But what if you could enjoy that sweet, spiced flavor in ice cream form, without the guilt? Well, now you can with this Pumpkin Pie Protein Ice Cream. Packed with protein, rich flavor, and creamy texture, it’s the perfect dessert to enjoy after a workout, as a snack, or just to indulge your pumpkin pie cravings in a healthier way!
Why Make Pumpkin Pie Protein Ice Cream?
- Fall-Inspired Flavor: Pumpkin pie is a seasonal favorite, and this ice cream version captures all of its sweet and spicy goodness. Imagine the perfect pumpkin filling swirled into creamy ice cream—heavenly!
- Protein-Packed: This version is not just for dessert lovers but also for fitness enthusiasts. With the addition of protein powder, it’s a great way to enjoy something sweet while getting your protein intake.
- Healthy & Guilt-Free: By using natural ingredients and swapping out high-calorie ingredients with healthier options, this ice cream is much lighter than traditional pumpkin pie ice cream.
Ingredients You’ll Need
Gather the following ingredients to make your own Pumpkin Pie Protein Ice Cream:
- 2 Cups Almond Milk (or any milk of your choice): A low-calorie milk option that helps keep the ice cream creamy without being too heavy.
- 1/2 Cup Pumpkin Puree: The star of the show! Use canned pumpkin puree or fresh pumpkin puree for the best flavor.
- 1/2 Cup Vanilla Protein Powder: Choose a high-quality vanilla protein powder to add creaminess and a protein boost.
- 1/4 Cup Maple Syrup: For a natural sweetener with that classic fall flavor.
- 1 Teaspoon Ground Cinnamon: Cinnamon brings that warm, comforting flavor of pumpkin pie.
- 1/2 Teaspoon Ground Nutmeg: Adds a spicy depth to the pumpkin pie flavor.
- 1/2 Teaspoon Ground Ginger: For a subtle, zesty kick.
- 1/2 Teaspoon Vanilla Extract: Enhances the sweetness and brings out the flavors in the ice cream.
- Pinch of Salt: Balances the sweetness and heightens the flavor.
Step-by-Step Instructions
Here’s how to make this delicious Pumpkin Pie Protein Ice Cream in your Ninja Creami:
- Prepare the Base
In a mixing bowl, combine the almond milk, pumpkin puree, vanilla protein powder, maple syrup, cinnamon, nutmeg, ginger, vanilla extract, and a pinch of salt. Stir the ingredients together until the mixture is completely smooth. The protein powder should dissolve well to prevent any clumps from forming. - Freeze the Mixture
Pour the ice cream base into your Ninja Creami pint container, leaving some room at the top for expansion as it freezes. Seal the lid tightly and place it in the freezer for about 24 hours or until fully frozen. - Process the Ice Cream
After the base has frozen solid, it’s time to process it in the Ninja Creami! Insert the pint into the machine, select the “Ice Cream” setting, and let the Ninja Creami do its thing. You’ll have a smooth, creamy ice cream in just a few minutes! - Re-spin for Extra Creaminess
If you want your pumpkin pie ice cream to be extra creamy and smooth, run the “Re-spin” cycle. This helps break up any ice crystals and gives the ice cream a perfect texture. - Serve & Enjoy
Once the ice cream is ready, it’s time to scoop and enjoy! Serve it in bowls or cones, and top it with a sprinkle of cinnamon or a drizzle of maple syrup for an extra touch of fall goodness.
Tips for Perfect Pumpkin Pie Protein Ice Cream
- Use Real Pumpkin Puree: While canned pumpkin puree is super convenient, fresh pumpkin puree often has a slightly richer flavor. If you have the time, roasting a pumpkin and pureeing it yourself will add an extra layer of freshness.
- Customize the Sweetness: You can adjust the sweetness by adding more or less maple syrup depending on your taste preferences. If you want it even sweeter, try a little honey or agave syrup.
- Make It Dairy-Free: For a dairy-free version, swap out the almond milk with coconut milk or any other dairy-free milk. Just be aware that different milk options may change the consistency slightly.
- Try a Crust Swirl: If you’re a fan of pumpkin pie with a crust, try crushing some graham crackers or making a low-sugar crust and swirling it through the ice cream to create that traditional pumpkin pie feel.
Cosmic Brownie Ice Cream
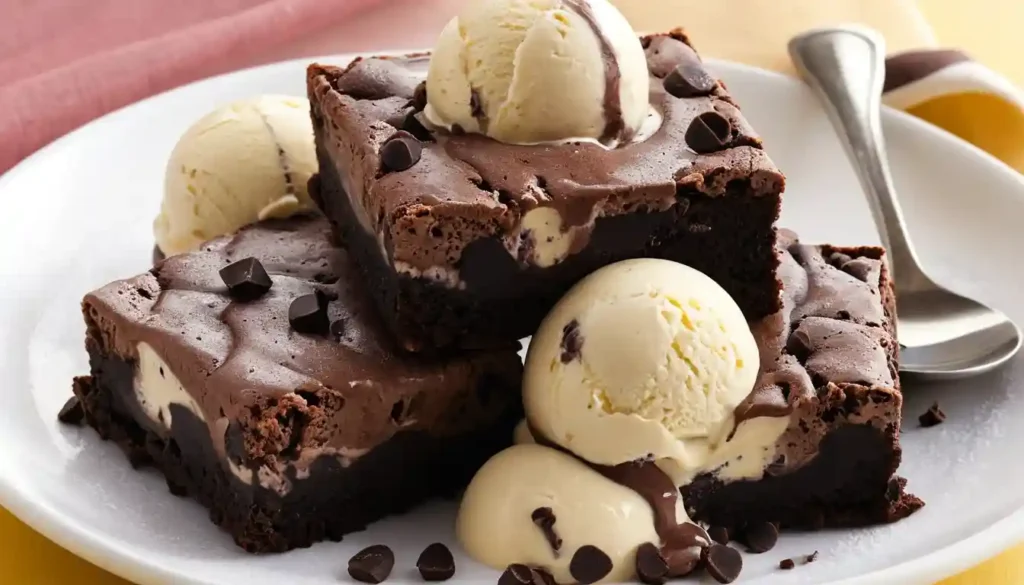
If you’ve ever indulged in a Cosmic Brownie, you know that they are more than just a sweet treat—they’re a burst of chocolatey goodness topped with colorful candy-coated sprinkles. Now, imagine turning that delicious, nostalgic dessert into an ice cream! Yes, you can make your very own Cosmic Brownie Ice Cream at home, and it’s just as fun and indulgent as the original.
This creamy, rich ice cream combines chunks of fudgy brownies, swirls of chocolatey goodness, and a sprinkle of rainbow colors for that cosmic touch. Whether you’re a kid or just a kid at heart, this treat is sure to please everyone.
Why Make Cosmic Brownie Ice Cream?
- Ultimate Comfort Food: Cosmic Brownies are a childhood favorite for many, and this ice cream brings that comfort food experience to a whole new level. It’s creamy, chocolatey, and packed with fun flavors!
- Easy to Make: Making this ice cream at home is surprisingly easy and doesn’t require any fancy equipment. With a Ninja Creami or similar ice cream maker, you can whip this up in no time.
- Customizable & Fun: You can change up the brownie mix, add different candies, or even swirl in other toppings to make the ice cream your own. The colorful candy sprinkles make it an extra fun treat for kids, especially for birthday parties or celebrations.
Ingredients You’ll Need
Here’s what you’ll need to make your own Cosmic Brownie Ice Cream:
- 2 Cups Heavy Cream: For that ultra-creamy texture, use heavy cream. This is the base for a rich and decadent ice cream.
- 1 Cup Whole Milk: Helps to balance the richness of the cream and gives the ice cream a smooth texture.
- 1/2 Cup Sweetened Condensed Milk: Adds sweetness and creates a super creamy consistency.
- 1/2 Cup Brownie Mix: For the brownie base—use any boxed brownie mix that you love. You’ll chop this up into pieces to mix into the ice cream.
- 1/4 Cup Mini Chocolate Chips: These will be mixed into the ice cream for extra chocolatey goodness.
- 1/4 Cup Rainbow Candy Sprinkles: For that cosmic touch! These give your ice cream that signature look and add a fun crunch.
- 1/2 Cup Chocolate Fudge Sauce: To swirl through the ice cream and make it extra gooey and chocolatey.
Step-by-Step Instructions
Ready to make this super fun Cosmic Brownie Ice Cream? Here’s how:
- Prepare the Brownies
First, bake the brownies according to the instructions on the box. Make sure to let them cool completely. Once cool, cut them into small chunks and set them aside. You want nice, bite-sized pieces that will mix perfectly into the ice cream. - Mix the Ice Cream Base
In a large bowl, whisk together the heavy cream, whole milk, and sweetened condensed milk. Mix until well combined and smooth. This will be your creamy base for the ice cream. - Add the Chocolatey Goodness
Stir in the brownie mix and mini chocolate chips into the base. This step is key to getting that rich chocolatey flavor and extra texture in your ice cream. Don’t overmix; you just want to ensure that everything is evenly distributed. - Freeze the Mixture
Pour the ice cream base into your Ninja Creami pint container or another ice cream container that can be sealed. Leave some room at the top for expansion as it freezes. Seal tightly and place in the freezer for at least 24 hours to freeze solid. - Process the Ice Cream
After the base has frozen solid, it’s time to process the ice cream. Insert the frozen pint into your Ninja Creami machine, select the “Ice Cream” setting, and let the machine work its magic! You’ll have creamy, thick ice cream in just a few minutes. - Add the Fudge Swirl and Candy Sprinkles
After processing, take the ice cream out and use a spoon to gently swirl in the chocolate fudge sauce. Add the rainbow candy sprinkles on top and give it one final gentle mix. This will give the ice cream that signature Cosmic Brownie look. - Serve and Enjoy
Once everything is mixed, it’s time to scoop and enjoy your Cosmic Brownie Ice Cream. Serve in bowls or cones and watch as everyone devours this chocolatey, colorful treat. Don’t forget to share it—it’s hard to resist!
Tips for Perfect Cosmic Brownie Ice Cream
- Use a Quality Brownie Mix: If you want the best flavor, opt for a high-quality brownie mix or even try making your own from scratch. The better the brownie, the better your ice cream will taste!
- Customize the Candy: While rainbow sprinkles are classic, you can mix in other candies or chocolate chunks if you prefer. M&Ms, mini marshmallows, or crushed candy bars would all work great!
- Make It Dairy-Free: You can use coconut milk and coconut cream in place of the whole milk and heavy cream for a dairy-free version. The texture will be a little different but still delicious.
- Add Some Nuts: If you like a bit of crunch, try adding chopped nuts like walnuts or pecans to the ice cream for extra flavor and texture.
FAQs
2. How long do I need to freeze the ice cream mixture?
The ice cream mixture should be frozen for at least 24 hours in a Ninja Creami pint container before processing. This ensures the base is frozen solid and will turn into the perfect creamy consistency once processed.
3. Can I customize the recipes to suit my dietary preferences?
Absolutely! All of these recipes can be easily adapted to suit various dietary preferences. You can use dairy-free substitutes like coconut milk and coconut cream for a vegan option, or swap out regular sugar for natural sweeteners like honey or maple syrup. You can also add nuts, seeds, or other toppings to personalize the flavors and textures of your ice cream.
4. How can I store homemade ice cream?
Once your ice cream is made, store it in an airtight container in the freezer to keep it fresh. Homemade ice cream is best consumed within a week or two, but if stored properly, it can last longer. Just make sure to let it sit out for a few minutes to soften before scooping if it becomes too hard.
5. What can I do if my ice cream is too hard after freezing?
If your ice cream turns out too hard after freezing, simply let it sit at room temperature for a few minutes until it softens. This will make it easier to scoop and enjoy. The Ninja Creami machine also helps to break down the ice crystals, making the texture smoother.
6. Can I add extra mix-ins, like candy or nuts, to my ice cream?
Yes! Feel free to add extra mix-ins like candy, nuts, or cookie crumbs to your ice cream after the base has been processed. Just gently fold them in for a fun, customized flavor experience.
7. Can I make these recipes into ice cream bars or sandwiches?
You can! Simply freeze your ice cream mixture in a flat pan or silicone mold, then cut it into bars or scoop it into sandwich-sized portions. You can even dip them in melted chocolate for an extra indulgent treat.
Final Thoughts
Creating homemade ice cream with your Ninja Creami is a fun and delicious way to treat yourself and your family to some sweet indulgence without the hassle of store-bought versions. From decadent flavors like Cosmic Brownie Ice Cream to healthier alternatives like Pumpkin Pie Protein Ice Cream, the possibilities are endless! With a few simple ingredients and a little creativity, you can make a variety of ice cream flavors that suit any occasion or craving.
Whether you’re experimenting with new flavors or sticking to the classics, Ninja Creami recipes bring a fun, customizable twist to your dessert game. Plus, making your own ice cream gives you complete control over the ingredients, so you can enjoy a treat that’s both delicious and healthier than many store-bought options.
Happy creating and enjoy every scoop!

